The title is not spelled wrong. Guerrillas are crafty, live by the seat of their pants fighters on the front lines. Gorillas are rough, hit-it-with-your-fists solvers of problems. Both of these are distinct VFX mind-sets we embrace. This series explores solutions to problems that are a little unorthodox, but effective. What’s outside the frame is Masking Tape. Smash away!
The Wild Blue Yonder From Closet Junk.
The fun part about being a VFX artist was once taught to me by a camera technician at the ILM camera stage. “What’s outside the edge of the frame is murder!” (Or something along those lines). This inference speaks to the truth of VFX before computers took over. Tape, bailing wire, and chewing gum held things together just long enough for an illusion to work. Those principles still apply, if you have a camera — and who doesn’t these days? When you find that the piece of clay in the shape of a dinosaur, or any of the items you imagined were spaceships, airplanes, or aliens when you were a child will actually work as a visual effect … that is a payday, my friend.
It makes you look at the first Star Wars films a different way, for sure. Imagine the insanity that is just outside the frame before the motion control camera makes a run for the wall, or the absurdity of giant armored transports, walking to destroy the rebels across a vast field of baking soda. These days, everything is turning into a digital simulation. Cool, and convincing if done right, but the magic trick has one explanation, and that lacks the intrigue of variety, outside the better digital technique. With practically filmed elements, happy accidents make magic, otherwise there are just accidents, and they make a mess, but it is all VFX in the end.
The advent of digital compositing is one of the greatest modern tools, because it allows an artist to take seemingly unrelated bits and pieces of the real world, paintings, and found images to create magic. It is interesting to see the latest 3D volume simulation, but there are times you just want to get it over and pour some laundry detergent or milk into a fish tank and film it. The Phantom Menace was still pouring salt over miniature rock walls to simulate a waterfall, and effectively at that!
With more powerful tools integrated from the digital side, the old techniques take on new life. It is a chance to use your problem solving skills.
The Impetus
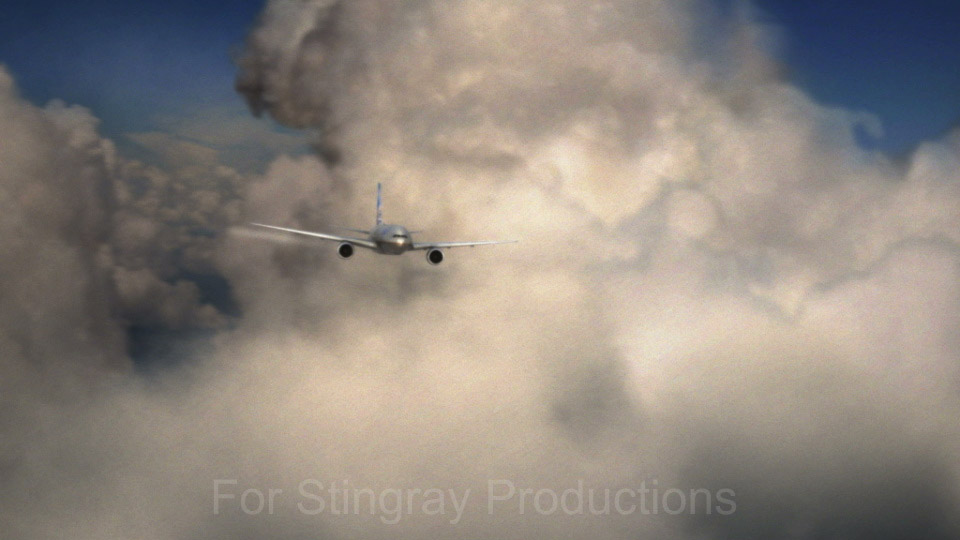
In 2007 a freelance job to create a matte painting for the motion picture The Brother’s Bloom, would allow for some Gorilla-style VFX. The shot in the film was of a jet airliner burning through the sky, as the camera whip-pans in a spectacular Star Wars inspired fashion. This was familiar territory for me, having done two movies like this at BOSS Film Studios (with the people who are now the client), and recently for a large format arena film. With a gift of an un-textured 3D model, a pre visualized camera move from Autodesk Maya, and a several photos of a cloudless landscape from 10,000 feet in the sky (shot through a passenger plane window), from the client, the job commended.
As the movie The Aviator taught us, it is difficult to sell the illusion of speed of an airplane without clouds in the sky, so that had to be solved quickly since the clock was ticking. A good matte painting is always based on good reference. The internet provides many options for photo reference, but cobbling together a shot with nothing more than downloaded JPEG images at the size needed, and under differing lighting conditions is more challenging than it sounds — and nothing in online photo stock libraries exactly fit the bill. “Matte-pasting” clouds together is a pain, and it takes a lot of effort to get good results. Often it is easier to “oil paint” them in a paint program, and hope you get the lighting convincing, but this was to be 10-12K wide painting, and that is a lot of smear brush work, and doesn’t lend itself to quick changes. Recalling the articles about VFX cloud banks in several films in the 1980’s, I started to think about photographing fiberfill clouds as a point of lighting reference, and then paint over them.
The challenging part of doing a shot in a short amount of time as a freelance VFX artist, is that you are often doing the work late night, and at home, or your small studio. With most stores closed as the plan was hatched, and with enough motivation not to wait (and the need for the clients to see a mockup as soon as possible), it was time to gather materials from what was around the house. Scavenger hunt VFX. Who needs sleep anyway?
Luckily there was the overstuffed couch. Massively overstuffed, actually. To alleviate aching necks, a garbage bag full of fiberfill was removed from the built-in couch pillows, and sequestered in the closet. Cloudstuff acquired! Also in that same closet were old wire hangars, and the masking tape box. Looks like a fake storm is brewing!
What a great closet that turned out to be.
A Cloud Is Born
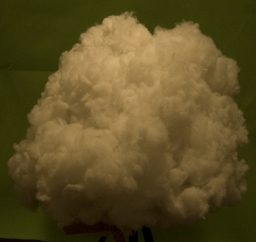
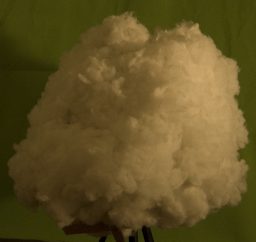
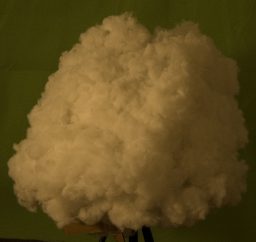
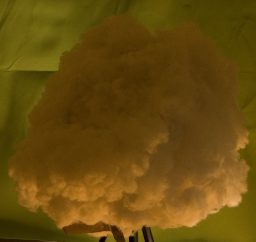
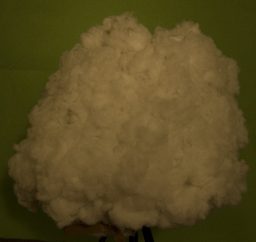
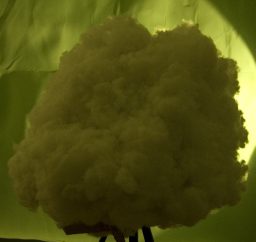
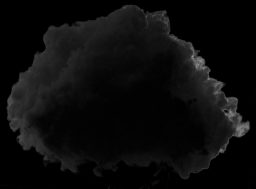
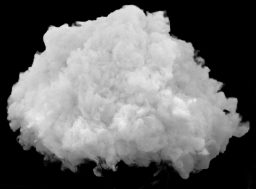
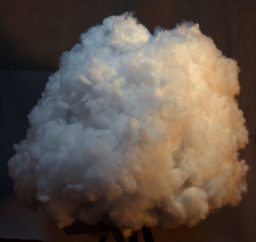
Here is the setup: A nice digital camera placed on an adequate tripod, and the cheesy low-cost tripod we all have stored somewhere, taped together with a mass of wire and fiberfill set up in the cloak room with a makeshift green screen, and every available lamp not tied down. (it’s like being in Film School again) I’d decided that instead of stretching out a long cloud bank and painting over it, that it would be easier to shoot individual elements of clouds for a potential 3D layout — fiberfill does not miniaturize that easily, my supply was limited, and this approach was a lot more flexible.
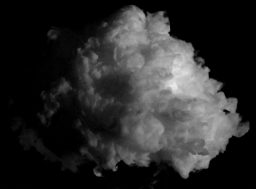
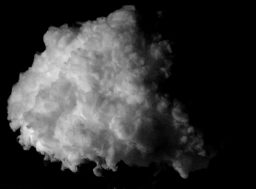
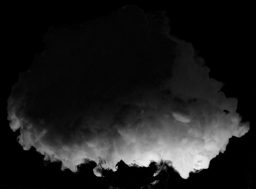
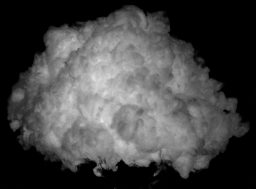
Several photo setups went on into the late evening, all from a fixed camera angle. Lights switched on and off for different lighting directions to gather multiple options for the painting. To light from the top, I bounced a light off of the white ceiling, and did a few shots with a flashlight rim-lighting the material. Never a professional lighting package stored in the closet when you need one.
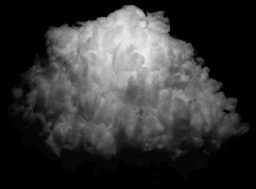
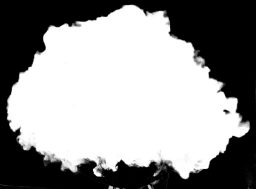
The digital photos were pulled off the camera, their exposure normalized, and green screen backgrounds extracted and painted out. As with Paul Debevec’s research, I am a fan of the work Paul Haeberli did in the mid 1990’s on synthetic lighting, and started to combine the few images I had to create unique combinations, to represent lighting angles I did not fully capture.
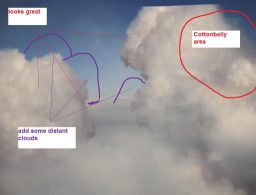
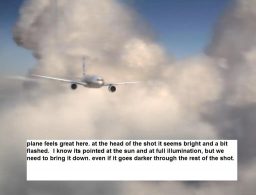
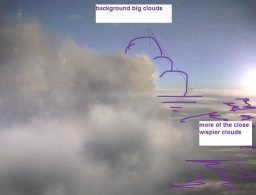
Careful combinations of layers resulted in several angles of sunset-colored light moving around a cloud with a sky-colored fill light — a sequence of six images per cloud setup. These images were laid out in a 3D composite in multiple layers and at varying scales to sculpt the cloud bank. Based on the angle of the camera to the direction of the key light source (the sun) , different frames were displayed, so the lighting would sit in the environment. Simple render tests were sent to, and marked-up by my client, who drew their notes on the images directly.
Once the initial layout was approved, several rendered images from the camera move were stitched together to form a cylindrical matte painting of the clouds. This was completed with a series of photographs of deep background land imagery taken during an international flight, and polished in Photoshop. To complete the scene misty clouds were placed in the near foreground – created with the methods explained in the next section, and mixed with rendered 3D imagery of the plane from Electric Image. Vapor trails from the wings were generated in Trapcode Particular for After Effects.
Rainbow Clown Clouds
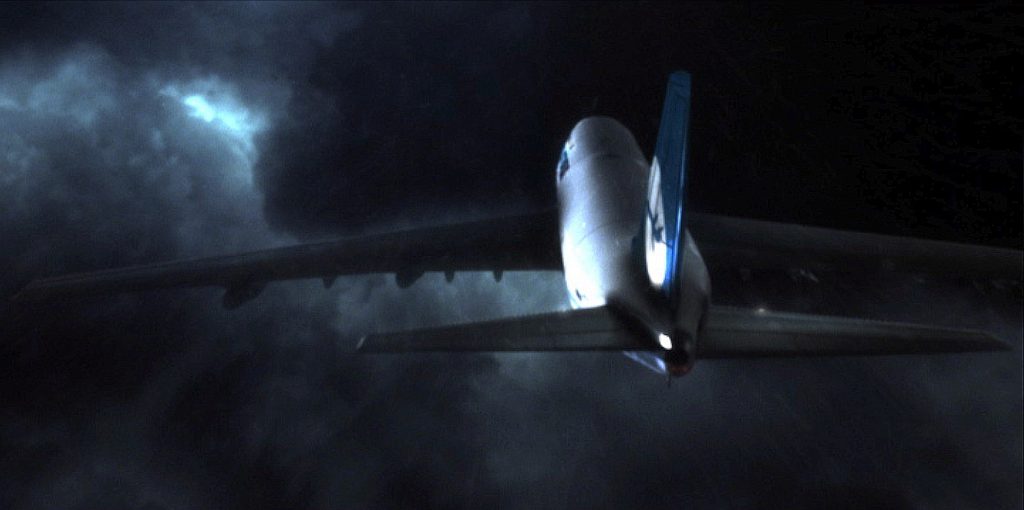
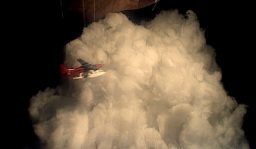
For the VES award winning pilot of the television series FRINGE, the action takes place in a Boeing 747 flying perilously at night during a lightning storm. Working fast and at low-cost was a priority for the VFX, and since fully volumetric 3D clouds would require many resources, with any changes necessarily going back through several departments, that would not be either low cost or fast. It was 2008, and volumetric clouds in 3D were not the “standard” in the industry for this work, especially on television. Lifting as much extra work off of the over-taxed 3D department as possible seemed the best approach, so the couch clouds technique, and a few layered matte paintings entered the mix.
Adding lightning flashes and foreground clouds to a stormy night scene, and a Boeing 747 was one of my first jobs in the industry. At BOSS Film Studios, working on the film Turbulence, a full stage was converted into a cloud bank made of fiberfill, photographed as miniature backgrounds, on top of which, layered matte paintings created the illusion of clouds passing by. Each layer was placed and scaled one-at a time, until the illusion of clouds appeared — many hours by many compositors. Over the years I had upgraded this technique for a large format stereo3D short to work entirely in a 3D composite, with dynamic level of detail. Rather than merely lay-out and scale planar matte paintings, this technique builds faux volumetric primitives from multiple layers of imagery, and assembles them into full cloud banks. Instead of painting images for each layer, full 3D cloud banks could be assembled with a more photographic feel. This time there would be no need of the stage, and a fully virtual fiberfill landscape, with dynamic lighting, atmospherics, and rain would be created entirely in compositing.
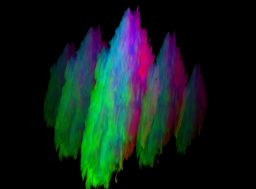
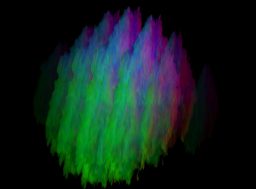
The volumetric “puff” is the resulting combination of photographed fiberfill layers stacked in 3D space, scaled based on distance to the center layer, with varying opacity, so that each roughly represented a slice of a complete cloud puff. Essentially a sphere made of a few slices, with scale and opacity reducing as layers move away from the center in z-space. Several different combinations of puffs were assembled.
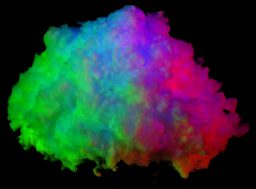
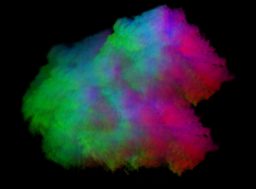
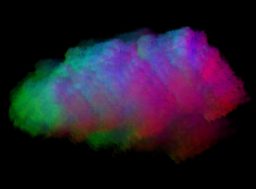
To represent the radical changes in lighting during a thunderstorm, the different lighting conditions from the photography session were multiplexed into the color channels of the initial layer by using various images from the sequence in the Red, Green, and Blue channels. By switching which direction the light came from in certain regions of the image (changing which color channel in the composite is used for the lighting information), a directional light source from a flash could be simply implied. (It makes it look like a clown designed a cloud, which invites several comments by anyone who walks by as you are setting it up, but that is half the fun).
The clouds were arranged into formation by scaling spheres in a Autodesk Maya which were then exported to After Effects using custom javascript importers. The 3D program allowed for fast blocking of cloud banks, and helped mitigate artifacts form overlapping at an angle. By varying the scale and density of the spheres I easily sculpted something that looked like cumulous clouds when replaced with the fiberfill volumetric primitives.
A further advantage of the multi-channel color method, is that local lightning strikes can be isolated through the use of 3D colored lights and gradients multiplied over the cloud formation. A red glow multiplied over the “clown cloud” would isolate the lighting information in the red channel locally, and allow lightning flashes to move through the clouds while maintaining their location in 3D space. Multi-colored lights and gradients introduced a level of chaos to the mix, because the flash direction could come from several source points, instead of the same cardinal angle every time. Occasionally a special cloud puff was inserted with the color channels mixed up — introducing another psuedo-random element. When all the color channels were mixed together, moonlight, and lighting flashes triggered together dynamically. By mixing it with a similar multi-channel color information pass on the foreground plane, a convincing storm ensued.
Once again, Trapcode Particular added the jet trails and rain, with a simple lateral move on the airplane generated in Lightwave by the 3D department of the show.
Moving examples of the Couch Clouds in action, and a demo made specifically for this article.
The Thrill Of Monkeying Around
The fiberfill cloud elements rescued from my couch, and photographed for a rush freelance job have more than paid for themselves, and continue to find multiple uses in shows and different VFX research. It is always nice to have the biggest tools, and maximum solution for the project in front of you, but that is not always possible, so it is necessary for the VFX artist to innovate their way to the finish line.
The lure of technological solutions in this business is part of what draws so many creative people to work so hard for an illusion that could only last one second, but those solutions have a cost in time, and require a level of knowledge to execute properly as one tries to recreate reality. So many hours have been spent trying to get the technical tool to work properly, but 100 years of cinematic illusion using found or created items still have resonance in the digital age. Light still works as it has since the late 1800’s, physics still operate, and water still flows. They too have their strengths and weaknesses, but in the end the elements all end up in the hands of an artist — and that makes all the difference.
Dig through those closets and junk drawers. Go make something with your hands. George Melies did. There is magic there.
AG

Pingback: VFX Touchstones: Part One — The Code Breakers - AGRAPHA Productions